Showing posts with label #365PerfectFoodles. Show all posts

Saturday, June 16, 2012

Zesty White Wine Butter Green Chilli Fish #Foodle


Having grown up in the city, I have great reverence for any home grown produce. And when I am the recipient of fruit or vegetable from anyones terrace or garden, I'm very excited. Last Week I paid Farzana Contractor, Editor of Uppercrust India Magazine a long overdue visit. It was a great meeting with much deliciousness to come from it. But this post is not about that. This is about food gifts... Farzana had just recievied a bagfull of produce from her farm, and she generously shared some lemons and chikoos from it. 

The lemons came at a very opportune moment too since I needed to test this recipe for my Cooking with Alcohol class and I hadn't been able to find Italian lemons. 

And it was most popular at the class as well, I served it and it was gone in Minutes! You can make the butter and freeze it indefinitely. Use Kingfish (Surmai) or any firm flesed fish. We did it with Basa at the class and it was quite brilliant because Basa's versatality and lack of overwhelming odur and flavour actually allows tha delicate flavours of the White wine and lemongrass to stand out. The Green asparagus is great but this is even berre with white asparagus or Witloof. 

Bon Apettit!

Zesty white wine Green Chilli Fish

Time: 40 minutes ; Serves: 2-4

Ingredients:
To make White Wine Butter
150ml White Wine
Zest of two Italian lemons/ Lemon flavoured Vodka
250 g butter, at room temp
2 tbsp Lime Juice
Sea salt

To make Fish
2 X 200 g boneless fish fillets
1 tbsp Lime Juice
salt and pepper to taste
1 green chilli minced
Green or White Asparagus to serve.

Method:
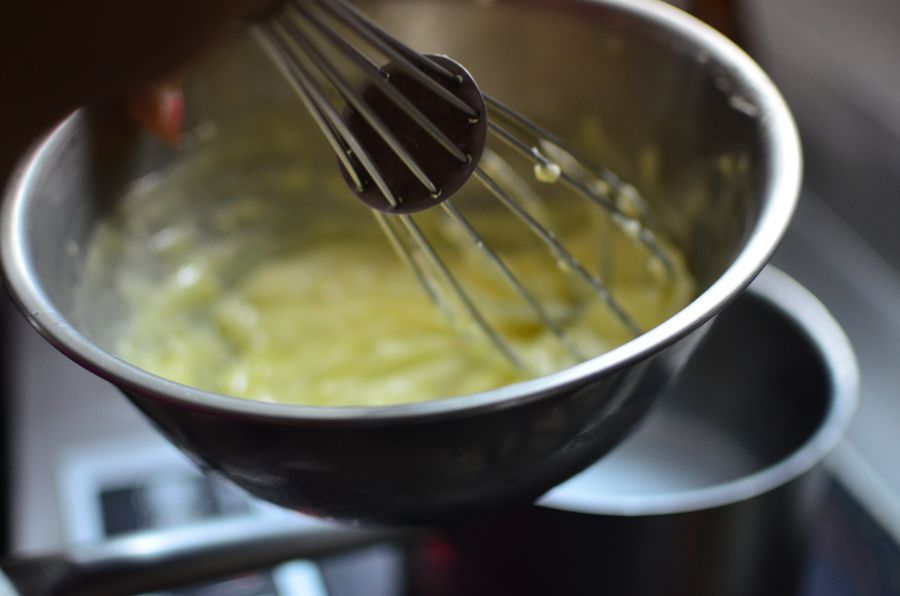
To make White Wine butter - Pour wine into a pan, add lemon zest. Simmer till wine reduces to half, leave to infuse and cool. When cool, strain and reserve. Place butter in a mixing bowl and add reduced wine, using a whisk mix to incorporate over a Double boiler but be carefull you do not want butter to liquify so keep a bowl onf ice water handy to cool it in. When done, keep beating over ice till butter begins to solidify. When butter is almost solid, stir in remaining zest and sea salt. Roll into a log and freeze. 

To make Fish - Season fish with green chilli salt and pepper and coat in olive oil and lemon juice. (add in a bit of wine if you like!). Reserve. Place a bed of asparagus in a baking pan, place marinated fish on top, cover with foilwrap and bake at 180 degrees in a preheated oven for 15- 20 minute. 

Alternatively melt a little butter in a large frying pan over medium heat and coom on a very low flame slowly till done and ligtly golden at the edges. This will take about 2 minutes for medium sized fish piece. Do keep in mind not to overcook as very crispy fish with take away from the flavour of the butter. Transfer to a plate, top with White Wine butter and serve hot over grilled asparagus spears or greens. 

Marinate Basa
Grate zest into wine
Cool


Whisk with Butter
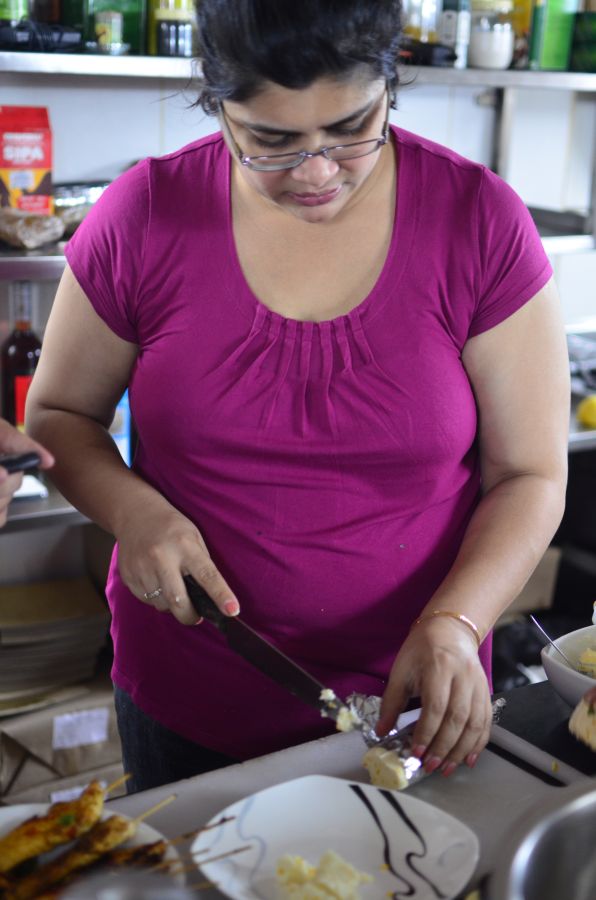
Transfer to foil and roll up. Freeze.


Cook fish lighly


Transfer to plate

Slice up frozen Butter

Arrange on top of hot fish.

Serve

Watch it get wiped out!

Down to the last lick!
GYAAN

Italian Lemons, Witloof, White Asparagus and Basa are all available at Fine food stores like Nature's Basket.

Sunday, May 20, 2012

My Grandmothers Chai Masala #Foodled for my sister Himanshi's Bday!


My sister Himanshi, who runs Foodie trails with me had just one claim to fame for the longest time. The 'tomboy' of the family she could not cook anything but she made a mean cup of Gujarati style Masala Chai! It is her birthday today and I thought this would be appropriate as a foodie gift for her. It is also in continuation of the Sun dried theme of yesterday as this hot sumemr is whne spices are dried and powdered and put away for the year in India.

Especially since Foodie Trails and Beacon Holidays are hosting an event at Australia's Biggest Morning tea on 17th June in Melbourne to support the Cancer Foundation. They will be showcasing tea’s and coffees form places like India, Turkey Asia and Africa. I am so proud of Himanshi, for taking this initiative up. We all do business, but it takes a lot more than business sense to show heart and compassion.

Gujarati Masala Chai is made by literally cooking Chai Masalla in water with fresh herbs. And we usually make a batch of chai masala and store it in an airtight jar to last a couple of months. It makes brewing that cup of tea whenever required, that much faster, convenient on rainy days, when the craving strikes more often.

This mix is good for relieving the aches and pains of colds, coughs, flu and fevers. I must confess, I hardly ever make chai the Gujarati way any more. I switched loyalties to coffee a long time ago. Rainy days and lazy Sundays, sometimes have me craving for the intensely flavoured brew I grew up drinking however. It is for those days that I still make and store chai masalla just like my grandmother did albeit in smaller quantities. Who am I kidding? I do it because I love the ritual of doling out the spices, grinding them and mixing them together and above all the aroma that fills my home when I make it. 

It is also handy to add to puddings, cakes and other baked goodies. I also added it to Chikoo milkshake which I find offsets the caramel sweetness of the fruit.

Ingredients
200 g Saunth (Dried Ginger)
200 g cardamom
100 g Black pepper
50 g Clove
50 g Cinnamon
2 pcs Nutmeg
8 Bay leaves

Method

Dry all the ingredients in the sun or in a low temp oven for 2 hours to ensure no moisture is left. Grind each spice indivisually in a dry grinder or coffee grinder. Strain out larger pieces with a fine sieve and grind again. Combine all the powdered spices and mix well. Transfer to an airtight jar to store.

Sun Tea and Sun Cooked Mango Chutney for my column in HT.


The folks over at HT Weekend were sweet enought to let me draw the graphic for my column this month. 
So the Sun Tea illustration was for them, and here is the Column 
Turn off the gas. Roast, toast and brew in the sun
Rushina Munshaw Ghildiyal - Hindustan Times Column (Look out for Spice Route on the first Sunday of every month)

I like the sun in small doses, but I don’t handle very well the sort of heat we’ve been having lately, and I do tend to complain about being cooked by the sun. Then, last weekend, I helped my mother and our maharaj prepare a year’s worth of chunda, a spicy-sweet mango preserve typicallymade in summer, and I realised that instead of cribbing about the heat, I could put the sun’s energy to some good use.

For hundreds of years, housewives, particularly in India, have used the sun to dry produce for use around the year. I have now joined their ranks, having spent the past month trying out different sun recipes on my balcony.

I have so far enjoyed considerable success with aam papad and sundried tomatoes. I was thrilled to successfully make aam papad or mango leather — something my grandmother made for us as kids. She would lay layers of mango purée out on a thali in the sun until they were reduced to thin, elastic film. We would wait impatiently for the fruit to dry out into luscious, golden-yellow, tangy goodness.

Aam papad is very easy to make: Just puree a cup of mango and spread thinly on a baking sheet or steel thali lined with 3 gm ghee. Cover with a net or muslin cloth and place in the sun. Take in at night, to prevent damage from dew. Continue until the mango is no longer sticky and has developed a smooth surface. You will know it is done when it easily peels off the thali. Roll into a cylinder and store in an airtight box.

You can dry apples, cherries, peaches, apricots, plums and strawberries in the same manner.

For the sun-dried tomatoes, slice cherry tomatoes or spoon tomatoes in half, sprinkle lightly with salt, olive oil, pepper and mixed herbs and spread out on a screen or flour sieve. Place in the sun until dry. Depending on the weather and the size of your tomatoes, this could take anywhere from four to seven days. Cover with a muslin cloth to keep insects and dust out and allow ventilation. Like the aam papad, you will need to bring it in at night, to prevent damage from dew.

This past month, I have also made sun tea, something my cousin, tea sommelier Snigdha Manchanda Binjola, first told me about. “Sun tea is the perfect antidote to summer laziness,” she always says. Snigdha warns, however, that brewing sun tea can encourage the growth of bacteria if left out for too long, so be careful.

That said, any tea can be brewed in the sun. So, for me, some days it’s English Breakfast with a slice of lemon and a few sprigs of mint; other days, it’s an Assam tea with sliced apple, cinnamon and cloves. Just combine and leave where the sun is hottest, for two to four hours. Then savour still warm from the sun, or have chilled, as iced tea.

Sun tea is much more mellow than regular tea, but the slow steeping really brings out the flavours — so herbal and floral teas work particularly well.

During my experiments with the sun, I remembered my friend Selin Rozanes, who conducts Turkish cooking tours in Istanbul, pointing to colorful bowls of jam lined up on balconies and in backyards. Turkish housewives often use the hot summer sun to finish cooking their jams and marmalades, Selin had said, adding that jams matured in the sun last longer and never crystallise.

This brought me full circle to the Gujarati chunda my grandmother made every year, which was cooked slowly for up to 20 days in the summer sun. Inspired, I decided to try a sun-cooked preserve. Alongside is the menu, so that you can try it too…


Sun Cooked Mango Chutney

Ingredients:
* 1/3 cup garlic, finely chopped
* 1/3 cup red chillies, finely chopped
* 10 peppercorns
* 2 cloves
* 8 large, semi-ripe mangoes, diced, stones reserved
* 12 red globe grapes, halved
* 1 tsp rock salt
* 3 cups sugar
* 2 cups wine vinegar
* 125 gm pitted red raisins

Method:
Soak chillies, garlic and spices in the vinegar for one hour. Add sugar and stir until dissolved. Combine mangoes, stones and grapes in a bowl. Add salt and leave for 15 minutes. Add vinegar mixture to fruit mixture. Stir in raisins and mix well. Transfer to a large flat tray. Cover with a muslin cloth and sun cook for three to four days (taking in at night to protect from dew), until mixture is reduced to jammy consistency. Transfer to a bottle, discarding stones, and store in refrigerator for up to two weeks. Serve as a chutney or on a cheese board with stinkier cheeses.

GYAAN and Links
Here is a link to the column on HTs website - http://www.hindustantimes.com/Entertainment/Food/Turn-off-the-gas-Roast-toast-and-brew-in-the-sun/Article1-858464.aspx 

My #365PerfectFoodles project was also featured in HT Cafe the same day in a story on food bloggers using technology on their blogs. Here ia link to the  PDF - https://www.box.com/s/f4ea7d507eb6d9b16161

Tuesday, May 01, 2012

Zhanzhanit Thencha Potatoes for Maharashtra Day !


“Zhanzhanit”- means electrifyingly spicy in Marathi, its an exclusive word used for chilli preparations, mostly the ones that are so hot that it makes one cry while eating. Marathi is the regional language of my home state of Maharashtra and the Maharashtrian communities that live here. This is the state in which Mumbai, the city where I was born, is located and I like to think there is a lot of Maharashtrian in me :) I have also grown up eating Maharashtrian food.  

Chillies which are intrinsic for adding heat to Indian food, only came to us in India in the 17th century with the advent of the Portugese. But for an ingredient that entered our cuisine so late, they managed to make themselves irreplaceable very quickly. Today they are extensively used and every region in India grows a different variety of chillies. Green chillies are used in daily cooking as part of the tempering, to spice up chutneys and salads but usually for their heat alone. 

The Maharashtrian Mirchi Thencha is one of the few Chilli recipes that roasts chillies to make a rustic condiment named after the method of preparation it calls for (Thencha means pounded). The smoky flavour from the roasting adds to the heat of the chillies and the aroma of the garlic. 

Preparation Time: 20 minutes; Serves: 4

Ingredients:

For Thencha
1/2 c hot spicy Green chillies
1 c Garlic, peeled
Salt to taste
Peanuts, toasted and crushed (optional)
Oil

For Thencha Potatoes
250g Baby potatoes par-boiled in salted water with jackets on
1 cup stock
2 tbsp of the Thencha
Salt to taste (if required

Method:
For Thencha : Roast chillies and garlic on a hot pan till slightly blackened. 
Place  in a mortar and pestle or blender and process to a coarse paste with salt and peanuts (if using). 
When done transfer to a jar. Thecha can be stored for 4-5 days in the refrigerator.

To make Thencha Potatoes : Mix Thencha with stock and add the potatoes. Toss well until coated. Taste and adjust seasoning if required. Cook till potato jackets are crisp (add 2 tsp of oil towards the end if you like).

Saturday, April 28, 2012

Prawn Money bags inspired by #Dimsumdiscovery with Chef Nilesh of Trikaya restaurant, Versova.

 
Dimsum often confused with Momo’s in India, are quite different. Moms tend to be more rustic, while Dimsums are more refined. But I am not known to dwell ont such things when faced with a plate of either of these with their comforting combinations of textures and flavours; soft starchy dough and savoury moist fillings of vegetable/seafood/ meat is one of my to go meals. Nothing appeals to me more than an array of flow of these bite-sized morsels which is why I have considered Yum Cha (Cantonese for the late-morning meal in which Chinese tea and dim sum are consumed in large quantities) to be the ultimate holiday comfort meal ever since I tried it in Singapore when I was at 13. Yum Cha is a must do no when I travel, especially to Melbourne. Unfortunately I have never found an equivalent in Mumbai. 

The thought of preparing dim sum from scratch even doing yum cha at home often occurred to me but the hugeness of the task usually quelled any further though. But when Trikaya restaurant at Versova (yes the same one of Pune fame) offered to have their chef, Chef Nilesh Limaye teach me and a group of my friends the intricacies of Dimdum makingt, I grabbed it. So our little gaggle of camera wielding food bloggers and writers all assembled at Trikaya yesterday to indulge in a foodie version of a Play Doh session! It was a total riot! We learned how to make the dough, roll it out, stuff it with assorted fillings and then sat down to a meal of some of Trikaya’s signature dishes. 

The afternoon was even more special for me because I took my 10 year old son Dimsum loving son, Aman, along. And I am so glad I did because he learnt everything perfectly, and made some really great Dim sums. And now, all that slicing, chopping, wrapping, steaming and frying do not feel as monumental. Once the marketing was done, including a side trip to Nature’s Basket where I was thrilled to find frozen Gyoza sheets and Spring Roll wrappers we had a fun family DimSum making session! Happily, not all dim sum needs to be made with the same level of artfulness – especially when one is in charge, oneself! While Dim sum at restaurants requires finesse, homemade dumplings are relatively forgiving and can be made without any tricky techniques. After all at its heart, yum cha embodies generosity, simplicity and healthfulness and eternal Dim Sum classics are easier to replicate than you think, and make a great way of bringing the family together. 

Brew a pot of Chinese tea, collect your family together, and get your hands dirty with a little Foodie Play Doh!  "Dim sum," does after all, translate to "touch the heart" that’s what all food is really about. Besides the Prawn Money bags I have illustrated above here are recipes from Chef Nilesh Limaye of Trikaya restaurant to get you started. 


Chef Nilesh
Salonee - came prepared!
Buch of happy foodies!
Mixing the dough.
We enlisted muscle power!
rollers
Make little round balls of ready dough.
Rolling out skin
making the Dimsum - eded up with a fat calzone!
Putting our Dimsum in to cook!
The fabulous kitchen team!
What should have been and what was!


Vegetable Kothe
Time : 30 minute ; makes 15 pieces
For the stuffing:
200 g mixed vegetables (Carrot, cabbage, beans, onion)
10 g celery, chopped fine
10 g spring onion, sliced fine
10 g garlic chopped fine
10 ml oil
Salt, pepper Soya sauce and toasted Sesame oil to taste
For the skin:
200 g Rice flour
100 g starch
Hot water

Method:
Combine the chopped mixed vegetables with garlic, celery and spring onion. Add salt, pepper, soya sauce and toasted sesame oil to taste and mix well
For the skin:
Combine rice flour and starch together in a bowl. Boil the water and add this hot water to the bowl at regular intervals, bringing the dough together. Knead to a smooth, soft consistency and leave to rest for 10 minutes. Roll thinly into even 5” discs. Place the vegetable stuffing in the centre and close the sides with a pattern pressing the edges between the index and the middle finger to make a dumpling in a shape of your choice.Repeat for the remaining stuffing and dough.When done steam on a double boiler or a steamer for 10 minutes. Serve hot with the red chili sauce, soy dressing. 
 
For the Sauces:
To make the Red chili sauce: blend a few tomatoes, red chili paste and garlic together to a smooth paste. Add salt, white pepper powder and dash of vinegar to balance out flavours to taste.
To make Soy dressing: Combine dark soy, Light soy, chopped mint, sugar, a dash of Mirin and whisk well together to blend. Adjust flavours to taste and serve.
Prawns Shao mai
For the stuffing:
200 g shrimp mince
10 g celery, chopped fine
10 g spring onion, sliced fine
10 g garlic chopped fine
10 ml oil
Salt, pepper Soya sauce and toasted Sesame oil to taste

For the skin:
15 nos fresh wanton skins

Method:
Mix the shrimp mince with the celery, garlic and spring onion. Add few drops of oil and the seasonings. Reserve. To make the Shao mai: Place the shrimp stuffing in the centre and close the sides with a pattern pressing the edges between the index and the middle finger. Make a dumpling into a shape of your choice (like the purses in my illustrations for example. Prepare similar for the remaining stuffing and skins. Steam on a double boiler or a steamer for 10 minutes. Serve hot with the red chili sauce, soy dressing.


Wednesday, April 18, 2012

A #Foodle Recipe - Spaghetti Alio Olio e Pepperoncino


Spaghetti aglio, olio e peperoncino or "spaghetti with garlic, olive oil and chilli” is a classic traditional Italian pasta dish that can be made quickly with ingredients available easily in our kitchens around the year. Usually made with Spaghetti, it also works with other pastas. My favourite Pasta for this dish is Capilleni. To get this past right, there are 3 important things to remember.

1.     Cook your Pasta right (here is a post on Cooking Pasta Right).
2.      Be generous with the ‘sauce’ of olive oil garlic, chillies and parsley. (Use pasta water to moisten if you want to control your oil intake.)
3.      Toss the cooked pasta in the ‘sauce’ in small batches for maximum flavour

Pasta Aglio Olio e Peperoncino -
Time 25 mins ; Serves 4
Ingredients:
1 pkt/500g Cappileni or Angel hair or Spaghetti no. 5 Pasta
5 l Water
150 g salt
4 tbsp extra virgin olive oil
½ c garlic chopped fine
1-2 tbsp red chilli flakes
½ c Coriander/Parsley
Grated Parmiggiano to serve

Method:
Bring 5 litre of water to a rolling boil.
Add 150 g salt and stir in until dissolved.
 Add pasta to the pot slowly and leave to cook till “al dente” (still slightly hard to the teeth in the middle). Drain and Reserve. Reserve a little of the pasta water as well.
Heat Olive oil in a small frying pan and, when it is hot, add the half the garlic and chilli. Keep flame on medium and stirfry gently for about 2 minutes.
To this pan add the half the parsley, stir fry for 30 seconds and then add pasta. Give everything a good toss using a little of the reserved pasta water to help things along.
Transfer onto warmed pasta plates and serve with Parmigiano on the side.
 

Tuesday, April 17, 2012

Cooking Pasta right for Natasha

-->


My 4.5 year old daughter Natasha is very fussy about her food. She eats only certain foods and likes singular flavours. In the case of pasta she likes hers "normal with olive oil and no kachra (AKA herbs spices etc). So it is important to me to cook pasta right. This is how I cook pasta and then toss it with the best EVOO I have to hand. And she can go through several servings of it. But getting your past right makes all the difference to any Pasta dish you make. So today’s Foodle is dedicated to my adoarable angel who wants to grow up and be a Cookin like her mom! It also features Farfalle or Butterfly pasta on her request because that is her favourite shape followed by “faggettti”  (spaghetti) J.

Its important to use good quality imported Italian dried pastas. Italian dried pastas are preferable to any Indian Brand. Italian pasta is made from Durum wheat Semolina which is high in protein and gluten and holds shape on cooking whereas local pastas are usually just maida, with no nutritional benefit and fall apart on cooking. Besides while the inventors of pasta might be debatable the fact is that the Italians have been making it for eons so why reinvent the wheel? 

How much pasta to cook is often a dilemma. The major difference between pasta as it is served in Italy and pasta as it is served in India is that for an Italian pasta is generally a first course, to be followed by a second course of some kind, be it meat, fish, vegetable, or even pizza. In other words, it is a part of a meal. And portion size usually reflects this. So if I am cooking pasta for an Italian meal with Salad and other components to the meal. The general rule of thumb I follow is 1 handfull (70-80 g) of uncooked pasta per peson = 2 cups cooked pasta. Add sauce and vegetables/meats etc and you should end up with about 3 cups ready pasta. ( I usually add lots of vegetables). So a 500 g packet will feed 4-6 people easily and I might even have leftovers cooked pasta for the next day. 

Pasta should be cooked properly to get the best results. Ideally Pasta should be cooked just before you are ready to eat and mixed with its sauce. In Italy at the homes of friends I have seen that the pasta water is kept ready and pasta is cooked just before everyone sits down to dinner. So when the antipasti course finishes, the pasta is ready. Its the rule I generally follow. But if you have to cook it ahead of time then when ready to eat "refresh" pasta by immersing briefly in boiling water and then mix with the sauce.

1.      Cook in enough water so past has room to 'swim' and doesn't end up clumping together. If you don't use enough water the pasta will be gummy, so don't be cunjus!  Use 1 ltr water per 100 g  pasta, (5 l for a 500 g pkt) And PLEASE, PLEASE do not add oil to your boiling water. No Italian cook adds oil to pasta water because that will not allow cooked pasta to absorb sauce. 

2.      Did you know that Neapolitans who are experts at cooking pasta because it first became poplular there used to use sea water to cook their pasta traditionally. So when you boil water to cook pasta add enough salt to make it salty as seawater. (It is important to get this right because you cannot correct this later). This means you need to add 2-3 tsp sea salt per litre. Don’t shudder at the thought of too much salt. The pasta will only absorb as much salt as it needs.
3.      Once the water is boiling, add pasta slowly so it does not all land in the water at one time and bring down the temperature of the water. Stir well so the pasta doesn't stick to the bottom. And keep an eye on it. The pasta package usually advises how long the pasta shape should cook for, but I start checking on it about 5 mins befor time to be safe.  

4.     Check on your pasta when its looking cooked (it should have become soft and doubled in size). A couple of minutes before it is supposed to be done, fish out a piece and break it open; in the center you will see a white uncooked portion that called anima. If this is very big, continue cooking the until the anima is barely visible. You can tell it's ready when it is "al dente", or tender to the bite but with a slight resistance.

     Drain pasta, giving it one or two good shakes to remove most of the water (it will continue to absorb water for a minute or two). Ladle a couple of ladles of the hot pasta water into a serving bowl, swirl it around to warm bowl and discard them, transfer cooked pasta to bowl, stir in olive oil or sauce and serve.